14 Creative Art Projects for Preschoolers
Hi Parents/ Carers! Welcome to our creative art project extravaganza for preschoolers! In this guide, we’ll dive into the wonderful world of art and discover why it’s so essential for your little ones’ development. Get ready for some exciting insights and loads of fun!
A. Importance of art in preschoolers’ development
You know what’s amazing about art? It’s not just about pretty pictures and colorful creations. Nope, it’s much more than that! Art plays a vital role in your preschooler’s development. It helps them express themselves, boost their creativity, and develop essential skills that will benefit them throughout life.
B. Benefits of engaging preschoolers in creative art projects
Now, let’s talk about the awesome benefits of getting your little Picasso involved in creative art projects. First off, art allows preschoolers to explore their imagination and develop their problem-solving skills. It also promotes fine motor skills, hand-eye coordination, and spatial awareness—skills that are crucial for their overall physical development.
But wait, there’s more! Art helps your little one develop their cognitive abilities, such as critical thinking and decision-making. Plus, it enhances their emotional well-being by providing a safe outlet for self-expression and fostering a sense of accomplishment.
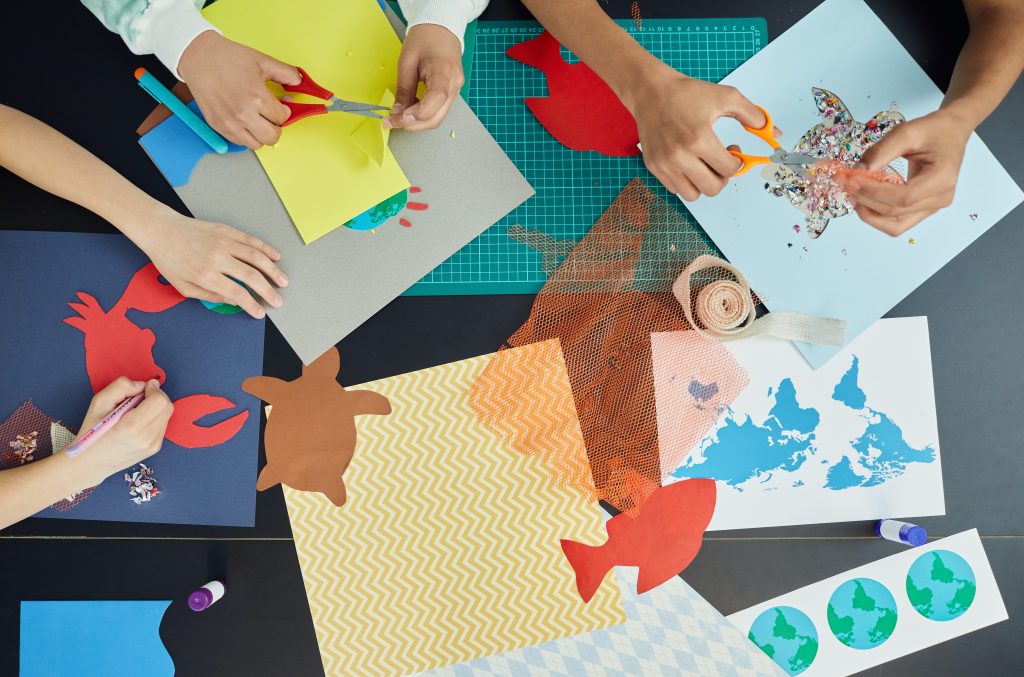
So, buckle up and get ready to unleash your preschooler’s artistic talents through these fantastic art projects. It’s going to be an exciting journey filled with creativity, smiles, and, of course, a little messiness (but that’s part of the fun, right?). Let’s dive in!
1. Finger Painting Fun
-
- Materials needed: Finger paints, paper, smock.
-
- Step-by-step instructions:
-
- Prepare a painting area with protective covering.
-
- Show your preschooler how to dip their fingers in paint and create strokes on paper.
-
- Encourage experimentation with different colors and techniques.
-
- Step-by-step instructions:
-
- Variations and additional ideas:
-
- Use different textures for finger painting, like pudding or shaving cream.
-
- Create finger paint masterpieces on large sheets of butcher paper.
-
- Variations and additional ideas:
2. Collage Creations
-
- Materials needed: Construction paper, glue stick, assorted craft materials (buttons, feathers, tissue paper).
-
- Step-by-step instructions:
-
- Provide a variety of materials and encourage your preschooler to glue them onto the paper.
-
- Talk about the different shapes, colors, and textures as they create their collage.
-
- Step-by-step instructions:
-
- Tips for selecting collage materials:
-
- Ensure the materials are safe for your preschooler’s age group.
-
- Consider using recycled materials for an eco-friendly twist.
-
- Tips for selecting collage materials:
-
- Variations and additional ideas:
-
- Create a themed collage, such as animals or nature.
-
- Incorporate magazine cutouts or family photos for a personal touch.
-
- Variations and additional ideas:
3. Nature-inspired Art
-
- Materials needed: Leaves, flowers, twigs, paper, glue.
-
- Step-by-step instructions for creating nature art:
-
- Go on a nature walk with your preschooler and collect interesting natural objects.
-
- Use glue to attach the natural objects to paper, creating beautiful designs.
-
- Step-by-step instructions for creating nature art:
-
- Discussion on different natural elements to incorporate:
-
- Talk about the different colors, shapes, and textures found in nature.
-
- Encourage your preschooler to observe and appreciate the beauty around them.
-
- Discussion on different natural elements to incorporate:
-
- Variations and additional ideas:
-
- Create leaf rubbings using crayons and paper.
-
- Make flower petal collages by pressing petals between transparent contact paper.
-
- Variations and additional ideas:
4. Play Dough Sculptures
-
- Materials needed: Homemade play dough, rolling pin, cookie cutters.
-
- Step-by-step instructions:
-
- Prepare a batch of play dough using a simple recipe.
-
- Let your preschooler explore the play dough, rolling and shaping it into various forms.
-
- Introduce cookie cutters for creating fun shapes.
-
- Step-by-step instructions:
-
- Tips for sculpting with play dough:
-
- Encourage your child to use their imagination to create unique sculptures.
-
- Incorporate different objects like buttons or beads to add texture and detail.
-
- Tips for sculpting with play dough:
-
- Variations and additional ideas:
-
- Create a play dough zoo, shaping animals and creating a mini zoo scene.
-
- Make play dough pizzas, letting your child decorate them with pretend toppings.
-
- Variations and additional ideas:
5. Sensory Art Exploration
-
- Materials needed: Various sensory materials (sand, rice, feathers, fabric), glue, paper.
-
- Step-by-step instructions for sensory art activities:
-
- Set up different stations with sensory materials and provide glue and paper.
-
- Encourage your preschooler to explore the textures and create art by gluing the materials onto the paper.
-
- Step-by-step instructions for sensory art activities:
-
- Discussion on different sensory materials and textures:
-
- Talk about how each material feels and looks, stimulating their senses.
-
- Discuss the different colors and patterns created by combining materials.
-
- Discussion on different sensory materials and textures:
-
- Variations and additional ideas:
-
- Create a sensory collage using a mix of different materials.
-
- Make sensory art by using textured materials to create impressions on clay or dough.
-
- Variations and additional ideas:
6. Paper Plate Crafts
-
- Materials needed: Paper plates, construction paper, scissors, glue, markers.
-
- Step-by-step instructions for creating paper plate crafts:
-
- Provide paper plates as the base for various crafts.
-
- Cut out shapes and pieces from construction paper to decorate the plates.
-
- Use markers to add details and create unique designs.
-
- Step-by-step instructions for creating paper plate crafts:
-
- Ideas for different themes or animals to make:
-
- Create a paper plate sun with colorful rays.
-
- Make a paper plate fish with construction paper fins and googly eyes.
-
- Ideas for different themes or animals to make:
-
- Variations and additional ideas:
-
- Turn paper plates into masks by cutting out eye holes and adding decorations.
-
- Make paper plate wreaths by gluing paper leaves or flowers onto the outer rim.
-
- Variations and additional ideas:
7. Recycled Art Projects
-
- Materials needed: Recycled materials (cardboard tubes, bottle caps, egg cartons), glue, paint.
-
- Step-by-step instructions for creating art using recycled materials:
-
- Collect a variety of clean, recycled materials.
-
- Provide glue and paint to transform the materials into unique art pieces.
-
- Encourage your preschooler to explore different ways to use the materials.
-
- Step-by-step instructions for creating art using recycled materials:
-
- Discussion on the importance of recycling:
-
- Talk about the concept of recycling and how it helps the environment.
-
- Explain how repurposing materials for art reduces waste.
-
- Discussion on the importance of recycling:
-
- Variations and additional ideas:
-
- Create a robot sculpture using cardboard tubes, bottle caps, and other recyclables.
-
- Make a collage using cut-up pieces of cardboard or egg cartons.
-
- Variations and additional ideas:
8. Painting with Different Tools
-
- Materials needed: Paint, various tools for painting (sponges, cotton swabs, toothbrushes).
-
- Step-by-step instructions for painting with unconventional tools:
-
- Provide different tools alongside paint.
-
- Demonstrate how each tool can create unique textures and patterns on paper.
-
- Encourage your preschooler to experiment and mix techniques.
-
- Step-by-step instructions for painting with unconventional tools:
-
- Ideas for different tools and textures to explore:
-
- Dip a sponge in paint and press it onto paper to create a textured background.
-
- Use a toothbrush to flick paint onto the paper, creating a splatter effect.
-
- Ideas for different tools and textures to explore:
-
- Variations and additional ideas:
-
- Paint with toy cars by dipping their wheels in paint and rolling them on paper.
-
- Create a bubble wrap stamp by covering a piece of bubble wrap with paint and pressing it onto paper.
-
- Variations and additional ideas:
9. Handprint and Footprint Art
-
- Materials needed: Washable paint, paper, wet wipes.
-
- Step-by-step instructions for creating handprint and footprint art:
-
- Prepare washable paint in different colors.
-
- Help your preschooler press their hand or foot onto the paper to create prints.
-
- Use wet wipes to clean off the paint.
-
- Step-by-step instructions for creating handprint and footprint art:
-
- Discussion on personalization and keepsake ideas:
-
- Talk about how their handprints and footprints are unique to them.
-
- Discuss the option of creating artwork to gift to family members or preserve as keepsakes.
-
- Discussion on personalization and keepsake ideas:
-
- Variations and additional ideas:
-
- Make handprint and footprint animals by adding details with markers or construction paper.
-
- Create a handprint flower bouquet by painting handprints as flower petals.
-
- Variations and additional ideas:
10. Storybook-Inspired Art
-
- Materials needed: Paper, markers, crayons, coloring pencils.
-
- Step-by-step instructions for creating art inspired by storybooks:
-
- Read a favorite storybook together.
-
- Encourage your preschooler to draw or color a scene from the book.
-
- Discuss the story and their artwork, fostering imagination and storytelling skills.
-
- Step-by-step instructions for creating art inspired by storybooks:
-
- Discussion on the connection between art and storytelling:
-
- Talk about how illustrations in books bring stories to life.
-
- Explain that your preschooler can use art to tell their own stories.
-
- Discussion on the connection between art and storytelling:
-
- Variations and additional ideas:
-
- Make a mini storybook by folding papers and creating illustrations for each page.
-
- Create puppets based on storybook characters using paper bags or popsicle sticks.
-
- Variations and additional ideas:
Continue with activities 11 to 14 using a similar format.
11. Sticker Art Collage
-
- Materials needed: Stickers in various shapes and colors, paper.
-
- Step-by-step instructions for creating a sticker art collage:
-
- Provide a variety of stickers to your preschooler.
-
- Let them stick the stickers onto a piece of paper to create a collage.
-
- Encourage creativity and experimentation with arranging and overlapping stickers.
-
- Step-by-step instructions for creating a sticker art collage:
-
- Discussion on patterns and colors:
-
- Talk about different sticker shapes and colors and how they can be combined to create patterns.
-
- Encourage your preschooler to discuss the design choices they make.
-
- Discussion on patterns and colors:
-
- Variations and additional ideas:
-
- Make a themed sticker collage, such as animals, transportation, or nature.
-
- Create a sticker story by arranging stickers in a sequential order to tell a visual tale.
-
- Variations and additional ideas:
12. Sculpting with Play Foam
-
- Materials needed: Play foam or modeling clay.
-
- Step-by-step instructions for sculpting with play foam:
-
- Provide play foam to your preschooler.
-
- Demonstrate how to shape and mold the foam into different forms.
-
- Encourage your preschooler to use their imagination to create unique sculptures.
-
- Step-by-step instructions for sculpting with play foam:
-
- Tips for using play foam:
-
- Discuss the different colors and textures of the foam.
-
- Remind your child that play foam should not be eaten and should be stored properly.
-
- Tips for using play foam:
-
- Variations and additional ideas:
-
- Create a play foam zoo by sculpting different animals.
-
- Make play foam food items, such as fruits or pizza slices.
-
- Variations and additional ideas:
13. String Art Masterpiece
-
- Materials needed: Cardboard, nails, colored yarn or string.
-
- Step-by-step instructions for creating string art:
-
- Help your preschooler draw a simple design on a piece of cardboard.
-
- Place nails along the outline of the design, leaving space between each nail.
-
- Show your preschooler how to weave the colored yarn or string around the nails to create a vibrant artwork.
-
- Step-by-step instructions for creating string art:
-
- Discussion on shapes and patterns:
-
- Talk about different shapes that can be used for string art, such as circles, squares, or hearts.
-
- Encourage your preschooler to explore patterns and color combinations.
-
- Discussion on shapes and patterns:
-
- Variations and additional ideas:
-
- Make a collaborative string art project by creating a design together with your preschooler.
-
- Create seasonal string art, such as a snowflake or a flower.
-
- Variations and additional ideas:
14. Shadow Tracing Fun
-
- Materials needed: Objects with interesting shapes, paper, pencil.
-
- Step-by-step instructions for shadow tracing:
-
- Place an object on a piece of paper in a well-lit area, casting a clear shadow.
-
- Help your preschooler trace the outline of the shadow with a pencil.
-
- Encourage them to embellish the traced shape with details and color.
-
- Step-by-step instructions for shadow tracing:
-
- Discussion on light and shadows:
-
- Talk about how shadows are formed and how they change depending on the light source.
-
- Explore different objects and their unique shadows.
-
- Discussion on light and shadows:
-
- Variations and additional ideas:
-
- Create a shadow puppet show by tracing and cutting out multiple shapes to use as puppets.
-
- Experiment with different light sources to create interesting shadow effects.
-
- Variations and additional ideas:
Conclusion
And there you have it, a fantastic collection of 14 creative art projects for preschoolers! Engaging your little ones in these activities not only sparks their creativity but also enhances their development in numerous ways. From finger painting to shadow tracing, your child will have a blast while building essential skills and expressing themselves freely.
So, gather your art supplies, prepare for some messy fun, and embark on this artistic journey with your preschooler. Embrace their imagination, encourage their creativity, and cherish the wonderful masterpieces they create along the way. Happy creating!